
Make Your Own Origami Box out of Recycled Paper
 |
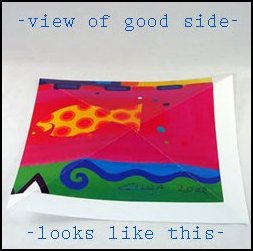
For this activity we'd like to welcome aboard our guest instructor, Hester Jane. For more projects, workshops and a blog, please visit Hester Jane's website www.funinthemaking.net This project works well with any kind of "found" paper - including our favourite - the glossy pages of National Geographic! |
|
Hester
says...Origami gift boxes are very versatile: organize your little
things, use as party favors, or hold keepsakes. You needn’t
spend a lot of money for wrapping paper; they look cool as is. You
don’t even have to buy origami paper. All you need is to keep
your eyes open for some cool paper just begging to be put to good use.
Magazines usually aren’t made with thick enough paper for
these boxes but sometimes their covers are. |
 |
|
Instructions: |
 |
|
2.
Before doing your
first fold, place your square so the back side is
up (the good side is face down). Then bring opposite corners together
and make a nice crease. |
 |
|
3. Unfold and bring other opposite corners together and make a nice crease. Your paper should now have fold lines in the shape of an x. |
 |
 |
|
4. Again, with the back side up, fold your paper in half vertically.. |
 |
|
5. Unfold. Fold paper in half horizontally. This means fold the bottom corners up to the top corners. (I forgot to take this picture: sorry.) |
 |
|
6. Unfold. Next fold in one of the corners. Point the corner to the exact center of the paper. You will know where that is by looking at the fold lines that you already made. |
 |
|
7. Fold in another corner. |
 |
|
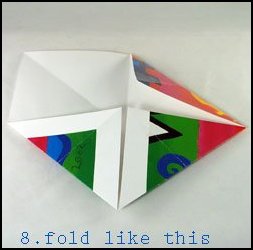
8. Fold in another corner. |
 |
|
9. Fold in last corner. |
 |
|
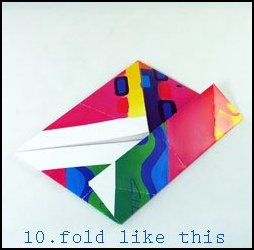
10. Fold the bottom up to the center as shown in the picture. |
 |
|
11. Fold the top: they should meet in the center. |
 |
 |
|
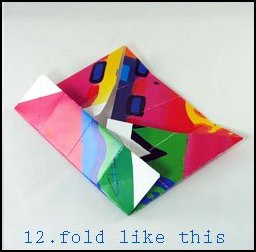
12.
Unfold. Fold one
side to the center. |
 |
|
13.
Fold the other
side. They should meet in the center. |
 |
|
14.
Unfold last two
folds. Pull open opposite corners. |
 |
|
15.
Fold up two
(opposite) sides. These will be two of the sides of
your box. |
 |
|
16.
To finish your box
you will have to fold the paper in as shown. |
 |
|
17.
I thought another
view might be helpful. This is the hardest step
to figure out. Hold your soon- to-be box top in the same orientation as
shown in the photo and you should be fine. |
 |
|
18.
Bring the corners
up and around to
the inside. |
 |
|
19.
Completed box top. |
 |
|
20.
Follow the same
instructions to make a bottom for your box; remember to cut the square
for your box bottom ¼ inch smaller that the square you cut
for
the top of your box. |
 |
|
If you've enjoyed the information on this page, please consider buying my novel Cold Play. The story is set on a cruise ship in Alaska, and the crafts on this page were inspired by the daily passenger activities which take place on board the ship. In Cold Play, Jason Davey has literally run away to sea after the death of his makeup artist wife, finding work as a contract entertainer aboard a much-adored but soon-to-be-retired cruise ship, the Star Sapphire.But when three people from his past come board as passengers, Jason's routine week-long trip to Alaska becomes anything but. |

